Desktop 1.5.3
Quick start
Open your first workspace, ask AI to read the story, and review a small edit.
Updated
On this page
Before you start
Download GeekArt and install the desktop app. Sign in before using AI, and check credits and usage if the app asks for an available allowance.
This guide follows The Harbor Ledger, the English fiction project shown on the Features page. You can download the example workspace and unzip it to a local folder. It includes three chapters, character notes, a timeline, a voice guide, and sample annotations. AI replies will vary.
1. Open a workspace
For the example, choose Open Workspace on the welcome screen and select the extracted The Harbor Ledger folder—the one containing Manuscript, Story Bible, and Planning. Select the folder, not the ZIP file or an individual chapter.
For your own story, choose Create Workspace and select a folder for the work. In the left file tree, right-click a folder and choose Create Folder or Create File. Enter a document name without an extension; GeekArt adds its own extension. You can also import an existing draft.
2. Open a chapter and its context
In the example, open Manuscript → 07 - Rainy Harbor, then Story Bible → Characters → Mara Venn and Planning → Voice Guide. Click the chapter tab to return to the scene.
The left panel organizes the work, the center is your editor, and AI Chat is on the right. Keep the relevant notes in the same workspace so you can ask AI to read them by name.
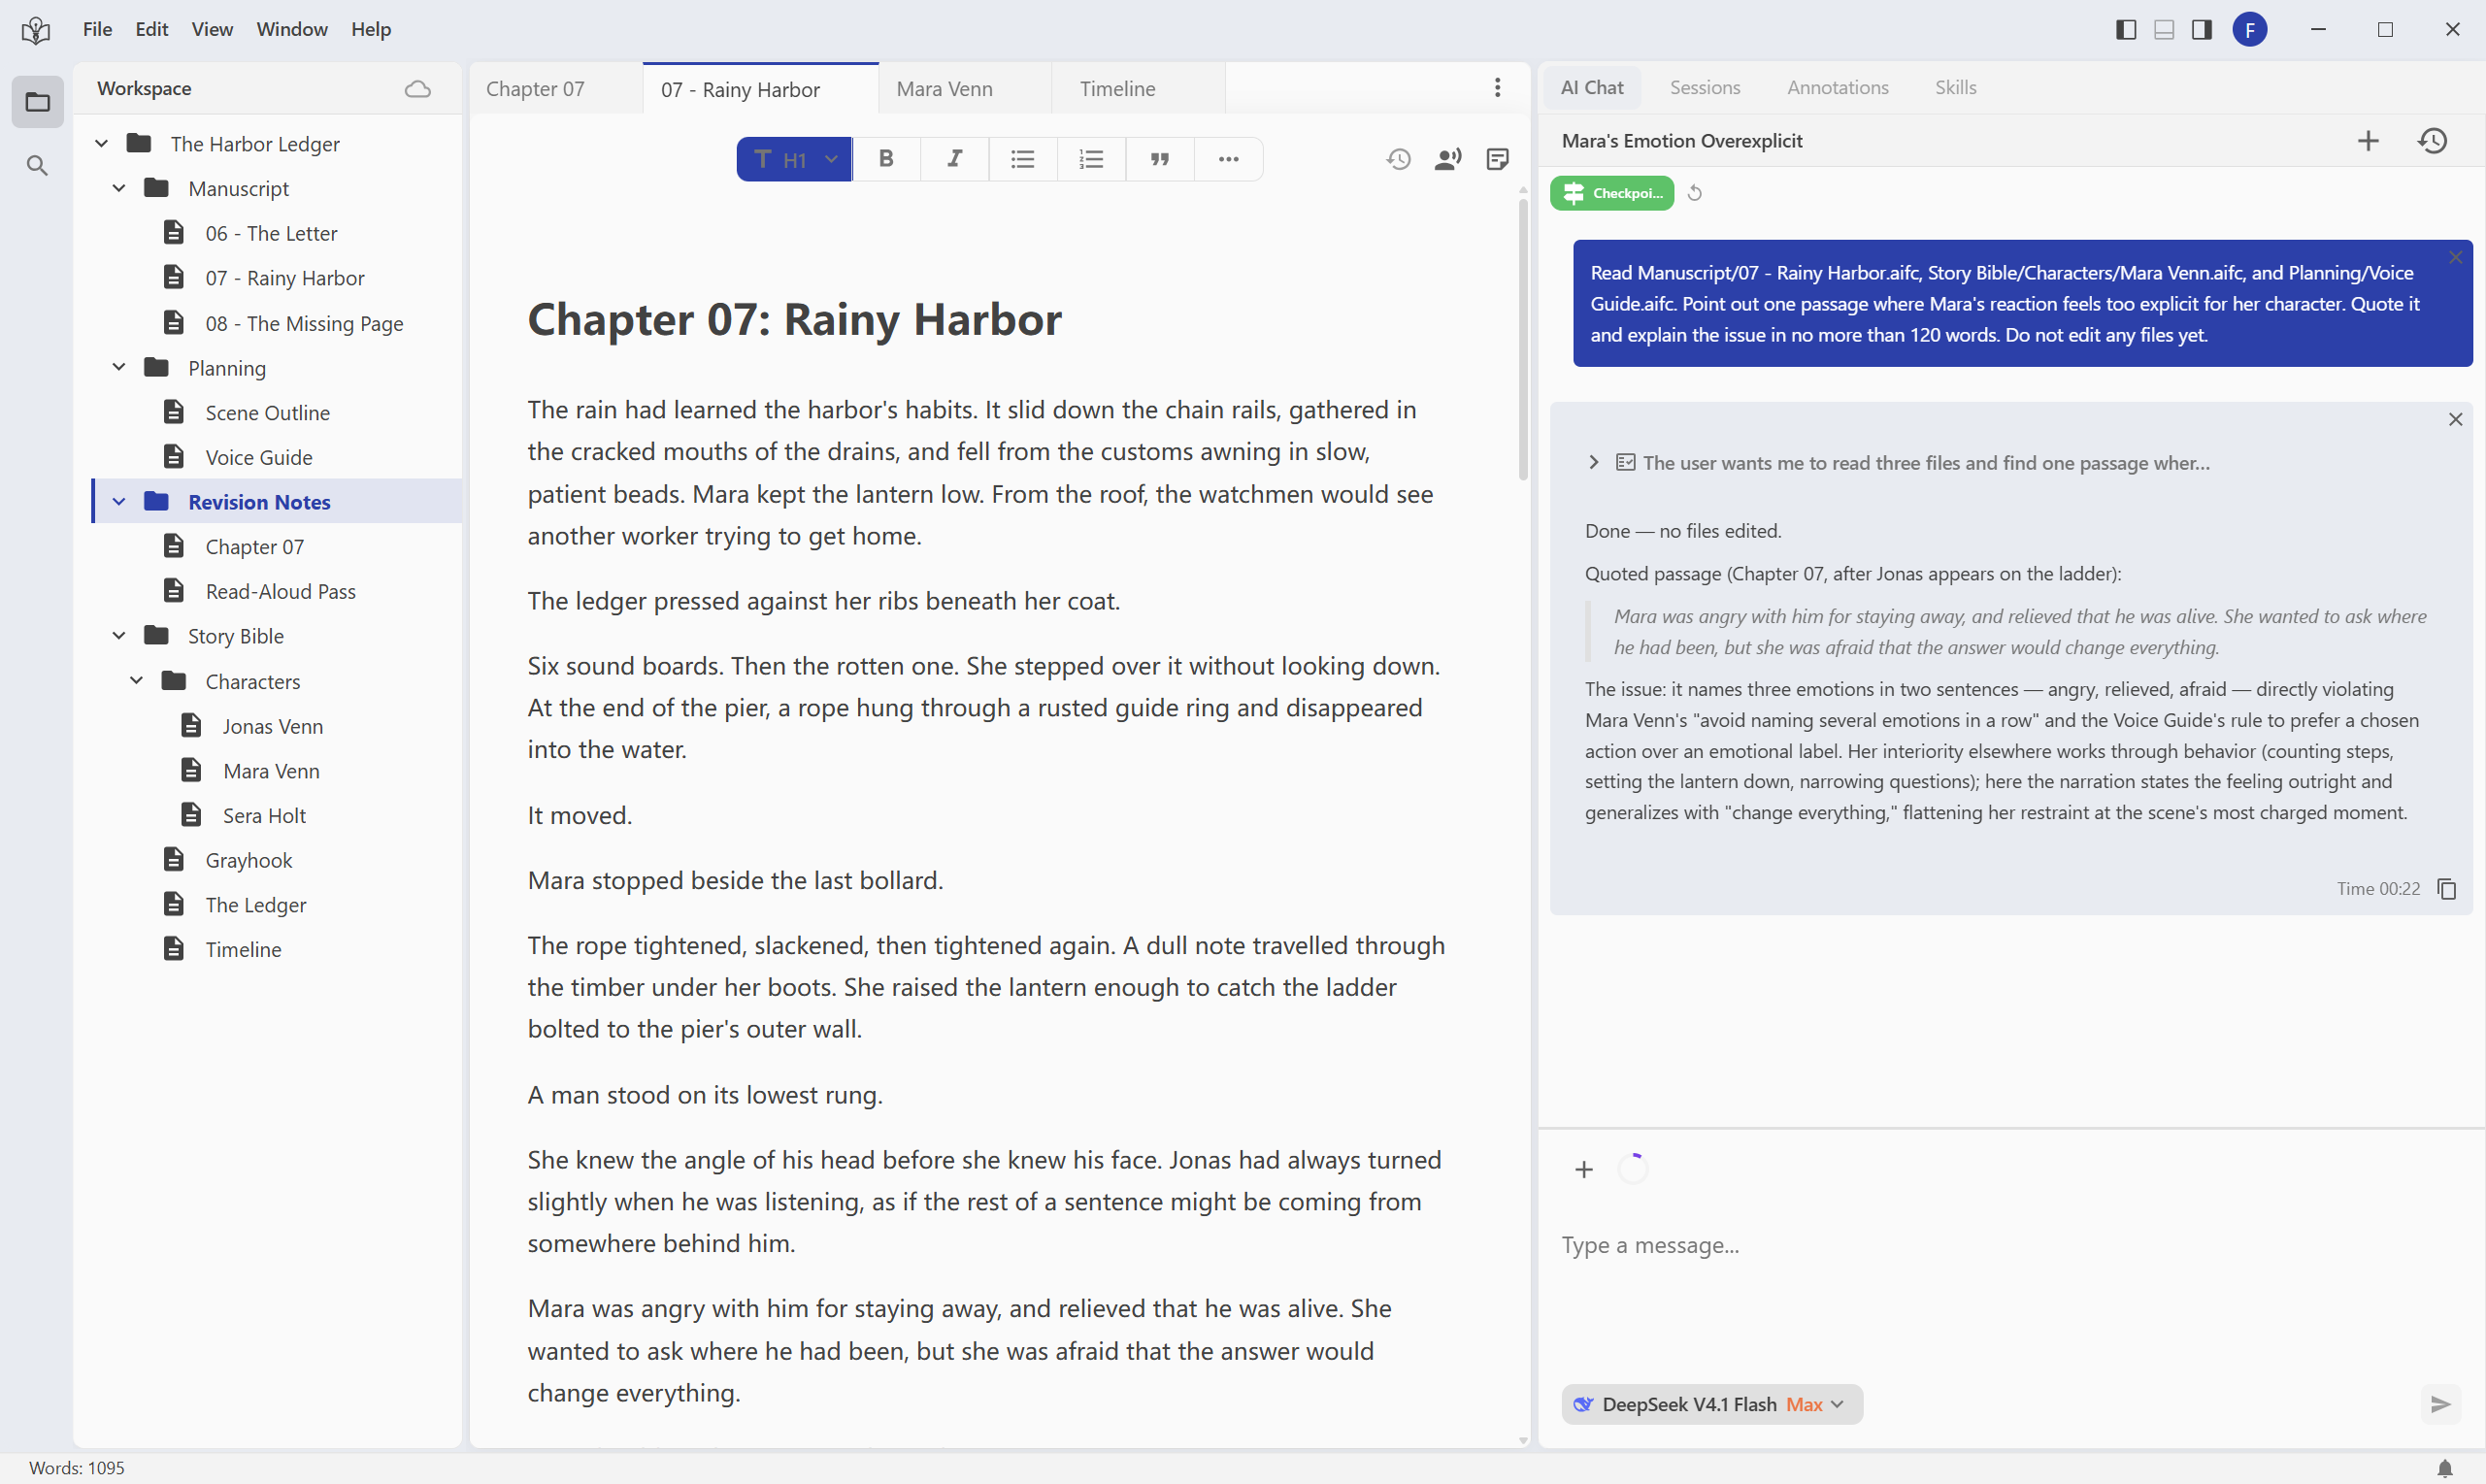
The screenshots use the English desktop interface. Select an image to view it at full size.
3. Ask AI to read before editing
Open AI Chat, choose an available model, and send this request. Replace the file paths if you are using your own material.
Read Manuscript/07 - Rainy Harbor.aifc, Story Bible/Characters/Mara Venn.aifc, and Planning/Voice Guide.aifc. Point out one passage where Mara's reaction feels too explicit for her character. Quote it and explain the issue in no more than 120 words. Do not edit any files yet.
Read the response and check that it refers to the intended scene and character. The purpose of this step is to decide what deserves a revision. If the response uses the wrong material, clarify the file names before requesting an edit.
4. Give one passage a clear direction
Find the paragraph beginning “Mara was angry with him for staying away…”. The example workspace already includes a pending AI annotation on this passage; use the editor's Show annotations control to display it.
For your own passage, select the text and press Ctrl + Shift + A on Windows or Cmd + Shift + A on macOS. Choose AI processing, set Processing intent to Edit, write the instruction, and select Create. A useful instruction states the desired effect, the scope, and what must stay unchanged:
Show Mara's anger through one small action. Keep her restrained, and don't explain why Jonas disappeared. Revise only this paragraph; preserve the surrounding scene.
Creating the annotation records your direction. To request the edit, send a message in AI Chat:
Read the pending AI annotation on the “Mara was angry…” paragraph in Manuscript/07 - Rainy Harbor.aifc. Consult Mara's character notes and the voice guide. Apply that annotation to its selected paragraph only, in two or three sentences. Preserve every other paragraph and leave the change for me to review.
5. Review the change
Return to the chapter when AI finishes. Inspect the marked additions and deletions, then use each revision's accept or reject control. Previous revision and Next revision move between changes. Accept All and Reject All apply to pending revisions in the current document.
Check the surrounding paragraphs as well as the revised lines. Keep the wording that fits Mara, reject changes that reveal too much, and continue editing in your own words. See annotations and revision review for the complete workflow.
You have finished this first pass when you have made a decision on the proposed changes and the scene reads the way you intend. Start the next pass with another specific passage or writing question.